How to Make Maple Syrup for Canning
Maple syrup, that sweet and rich delight, is so much more than just a breakfast staple; it s a time-honored tradition that invites the beauty of nature right into your kitchen. By understanding the nuances of canning, you can enjoy this beloved treat even more.
This guide walks you through the entire process of making maple syrup, from selecting the right equipment and supplies to the essential steps of tapping trees and boiling sap.
You ll also find tips for perfecting your syrup and proper canning techniques to ensure your homemade batch remains fresh. This guide will help you master the art of storing maple syrup for long-term enjoyment.
Whether you re a seasoned syrup maker or a curious beginner, get ready to discover the fun of crafting this beloved treat in the comfort of your own home!
Contents
Key Takeaways:
- Collect sap from trees and boil it to make syrup.
- Can and store syrup properly for a longer shelf life.
- Use expert tips and tools to improve your syrup-making process.
What is Maple Syrup and Why Can it?
Maple syrup is a delightful sweetener that springs from the sap of maple trees, and mastering the art of canning it is vital for preserving its rich flavor and ensuring it remains safe for your enjoyment. This process requires meticulous temperature control, careful filtering, and the use of sterilized jars to maintain the syrup s quality.
By understanding the advantages of canning maple syrup, you can indulge in homemade syrup throughout the year, relishing its unique taste no matter the season.
Originating in the northeastern regions of North America, this sweet treat has deep roots in Native American traditions, with many families passing down techniques from generation to generation. The sap collection typically takes place in early spring, when the temperatures dance between freezing nights and warm days, coaxing the sap to flow.
After harvesting, the sap undergoes a boiling process that transforms it into syrup, capturing the very essence of the trees. By canning your syrup, you not only extend its shelf life but also preserve its authentic flavor, allowing you to savor this delightful taste long after the maple season has ended.
Equipment and Supplies Needed
To craft the perfect maple syrup, you’ll need a range of essential equipment and supplies. Start with sterilized mason jars to store your syrup safely.
Filtering tools, like coffee filters and cheesecloth, are crucial for maintaining the syrup’s quality and safety. Don t forget to use a candy thermometer (a tool for measuring temperature in candy making); it enables you to control the temperature during the boiling process meticulously.
This precision is vital for achieving that ideal consistency and optimal sugar content, which can be further enhanced by using a hygrometer (a device that measures moisture content) to measure moisture levels.
Essential Tools for Making Maple Syrup
Essential tools for crafting maple syrup include a candy thermometer, a water bath canner for the canning process, and food-grade plastic containers for safe storage once bottled. These tools are pivotal in ensuring that your syrup is produced with precise temperature control and remains free from contaminants, including harmful fungal spores that can compromise its quality.
The candy thermometer is crucial for accurately gauging the syrup s temperature, ensuring it reaches that ideal 219 F before bottling. This step is key to preventing overcooking, which could lead to unwanted crystallization or a burnt flavor.
The water bath canner serves as a protective measure during the canning process, gently heating the syrup to eliminate potential bacteria while ensuring a proper seal for long-term storage.
Meanwhile, food-grade plastic containers are not just reliable for conservation; they also prevent any harmful substances from leaching into the syrup.
Together, these essential tools elevate both the quality and safety of your final product, resulting in a delicious syrup that is not only enjoyable but also safe for consumption.
Now you’re ready to start your maple syrup journey happy tapping!
Steps for Making Maple Syrup
Maple syrup is a delicious treat enjoyed by many, crafted through several meticulous steps. The journey begins with the careful collection of sap from maple trees. Once gathered, this sap undergoes boiling. This process concentrates its natural sugars, transforming it into that sweet elixir you crave.
After boiling, the syrup is filtered to eliminate any impurities or fungal spores. This ensures that what you ultimately enjoy is not only delectable but also safe. Each of these stages plays a vital role in producing high-quality maple syrup, elevating your experience with every drop.
Tapping Trees and Collecting Sap

Tapping trees for sap collection is an essential first step in crafting maple syrup. Using the right techniques is key to achieving the best sap flow conditions and temperature control. Understanding the ideal times and methods to tap maple trees can significantly influence both the quantity and quality of sap you collect.
This process kicks off when temperatures begin to rise in late winter or early spring. It s particularly effective when daytime temperatures hover around 40 F and nighttime temperatures dip below freezing. This fluctuation creates the necessary pressure in the tree, setting the sap in motion.
To ensure success, you ll want to select the right tools, like a clean tap or drill. Pay close attention to your drilling depth and angle. This minimizes harm to the tree while maximizing your sap extraction. Keep an eye on the weather conditions and local forecasts as these elements are crucial in guiding the sap s movement within the tree, directly affecting your syrup yield.
Boiling and Filtering the Sap
Boiling the collected sap is an essential phase in crafting maple syrup. Achieving the perfect temperature is key to evaporating water and concentrating the sugars. Filtering the syrup is equally important, effectively removing impurities, including pesky fungal spores. This meticulous process shapes the syrup’s final taste and quality.
You ll typically find boiling happening around 219 F. This temperature demands your careful attention, as it can take several hours to reach just the right consistency. Watch as the sap evolves into a rich syrup, with its flavor and aroma deepening beautifully.
Once the boiling phase is complete, filtering becomes necessary. Using tools like fine mesh or felt filters ensures that any lingering particulates are effectively removed. This safeguards your syrup against impurities and ensures a clean bottling process. Cleanliness and safety are paramount, especially when transferring the syrup into sterilized jars. This practice prevents contamination and preserves the syrup s exquisite flavor for longer storage.
Testing and Adjusting for Proper Consistency
Testing and adjusting the syrup for the perfect consistency requires keen attention to detail. Monitor the temperature closely with a candy thermometer. Make sure that the sugar content aligns perfectly with your syrup quality goals while maintaining the right headspace in your jars for safe storage. These elements are essential for crafting that ideal homemade syrup.
To achieve the perfect viscosity, aim for a temperature between 219 F and 221 F. This range indicates that enough water has evaporated, allowing you to create a rich, thick syrup. If the sweetness isn’t quite right, gently heat the solution and add more sugar until you hit that delightful sweetness.
When it s time to bottle your creation, remember to leave about a half-inch of headspace. This small detail allows the syrup to expand without spilling over, ensuring a tight seal and reducing the risk of spoilage.
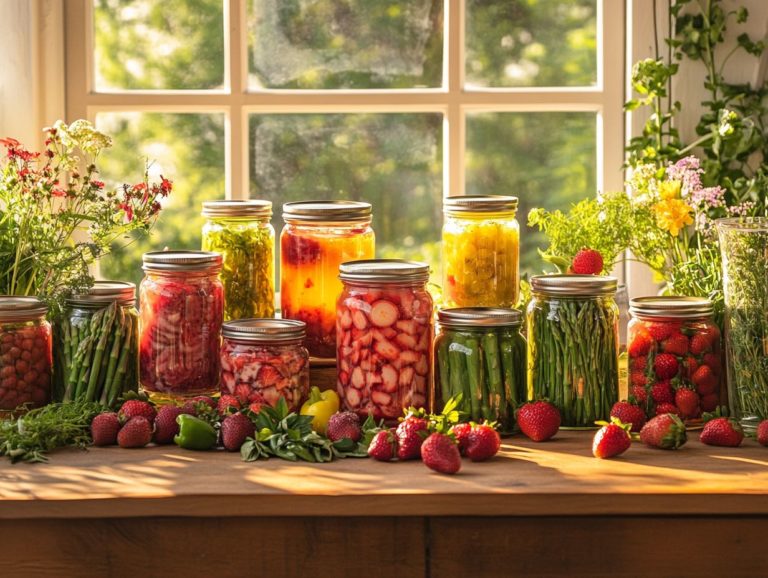
Canning and Storing Maple Syrup
Canning and storing maple syrup correctly is crucial for preserving its rich flavor and preventing spoilage. By using sterilized jars and employing appropriate storage techniques in ideal locations, such as a root cellar or basement, along with food-grade plastic containers, you can create the perfect environment for your syrup.
This careful method keeps your syrup delicious for months! With the right canning and storing techniques, you can extend its shelf life.
Now that you ve mastered boiling, get ready for the sweet reward!
Proper Canning Techniques
Proper canning techniques are essential for ensuring both the safety and quality of your maple syrup. This involves using sterilized jars, maintaining the appropriate headspace, and securely sealing them with jar lids to prevent any contamination. By following these methods, you preserve the syrup’s rich flavor and protect it from spoilage over time.
To kick off the canning process, you should begin by thoroughly cleaning and sterilizing your jars. This step is crucial to eliminate any potential bacteria or contaminants. A simple way to achieve this is by boiling the clean jars in water for at least 10 minutes to ensure they are properly sterilized before filling them with hot pack syrup.
Once your jars are ready, the next phase is to fill them with warm syrup, making sure to leave the necessary headspace typically about a quarter inch to allow for expansion. After that, firmly apply the lids to create a vacuum seal, which is vital for maintaining the integrity of your syrup.
Each of these meticulous steps is significant in ensuring that the final product remains both delicious and safe for consumption.
Storage and Shelf Life

Understanding syrup storage and shelf life is essential for maximizing the longevity of your homemade maple syrup. Store it in a cool, dark place, such as a root cellar or basement, where managing temperature is more straightforward. This approach preserves its flavor and quality for a longer time.
Creating the right conditions is key to preventing spoilage. Ideally, maintain a temperature below 60 F (15 C) (the equivalent of about 15 C), as anything higher can speed up deterioration.
Containers also play a significant role in maintaining freshness glass jars are your best bet over plastic. They re airtight and non-reactive, ensuring your syrup stays delightful. Make sure to protect your syrup from light exposure, as ultraviolet rays can compromise its quality.
To identify spoilage, watch out for changes in color or odor. To prolong shelf life, consider refrigerating opened syrup, and if you re aiming for long-term storage, freezing it is a smart move.
So, get your jars ready and start preserving your delicious syrup today!
Tips and Tricks for Making Maple Syrup
Making maple syrup is an exciting art! You can refine your skills with some handy tips and tricks. Consider expert advice on managing sugar content, optimizing sap collection, and mastering the boiling process to elevate your results.
These insights can greatly enhance the quality of your homemade syrup, allowing you to create a product that s not just good, but exceptional.
Expert Advice for Better Results
Expert advice can dramatically elevate the quality of your maple syrup, underscoring the necessity of monitoring moisture content and keeping fungal spores at bay during production. These insights can transform your syrup-making journey into a more rewarding experience.
Seasoned producers strongly recommend using a refractometer to accurately measure sugar concentration, ensuring your syrup achieves that perfect consistency. Keep a clean workspace and regularly sanitize your equipment to minimize contamination risks.
Using methods like reverse osmosis can make your process faster by reducing boiling time, as this method effectively extracts excess water from sap before cooking. By thoughtfully incorporating these practices, you not only enhance the flavor profiles of your syrup but also streamline the entire production process, ultimately producing a superior end product.
Frequently Asked Questions
How do I make maple syrup for canning?
To make maple syrup for canning, gather fresh sap from maple trees, boil it until it’s thick, pour it into sterilized jars, and process in a hot water bath to seal.
What tools do I need to make maple syrup for canning?

To make maple syrup, gather a large pot for boiling sap. You will also need a thermometer, a ladle, and canning jars with lids.
How long does it take to make maple syrup for canning?
The time varies based on the amount of sap and syrup consistency. Typically, it takes 6-8 hours to boil down 40 gallons of sap into 1 gallon of syrup.
Can I add flavorings to my maple syrup for canning?
Absolutely! You can enhance your syrup with vanilla extract, cinnamon, or nutmeg. Use high-quality ingredients and add them once the syrup reaches the desired thickness.
How long can I store canned maple syrup?
Store canned maple syrup in a cool, dark place for up to a year. After opening, refrigerate it and enjoy within a few months for the best taste.
Can I reuse canning jars for maple syrup?
You can reuse canning jars if they are in good condition. Make sure to sterilize them before use to keep your syrup safe.